 English
  Español
  Deutsch
Handwerks- und Materialführer
Ein genauer Blick darauf, wie Farbstoffe, Pigmente und Beschichtungschemie darüber entscheiden, ob ein Laser einen sauberen oder einen beschädigten Abdruck hinterlässt.
Direkte Antwort: Ja, aber die Art des Abschlusses bestimmt das Ergebnis
Die Lasergravur kann auf gefärbtem oder bemaltem Leder durchgeführt werden, wobei die Oberflächenbeschaffenheit in den meisten Fällen nicht zerstört wird – das Ergebnis hängt jedoch stark davon ab, wie die Farbe aufgetragen wurde und wie tief sie im Material sitzt. Anilingefärbte und pflanzlich gegerbte Leder, die Farbe in die Faserstruktur aufnehmen, neigen dazu, sauber zu gravieren , weil der Laser einfach die Oberflächenschicht, auf der sich das Pigment befindet, entfernt oder verkohlt, wodurch ein kontrastierender Farbton darunter zum Vorschein kommt. Bemaltes, pigmentiertes oder stark beschichtetes Leder verhält sich anders: Die Farbschicht kann Blasen bilden, abblättern oder ungleichmäßig verbrennen, wenn die Leistungseinstellungen nicht speziell für diese Beschichtung angepasst werden.
In der Praxis bedeutet dies, dass die Frage weniger „Ist das machbar“ als vielmehr „Wie kalibriere ich den Laser für dieses spezielle Finish“ lautet? Bediener, die den Unterschied zwischen absorbierter Farbe und Oberflächenfarbe verstehen, können scharfe, kontrastreiche Markierungen mit minimaler Beschädigung der Oberfläche erzeugen. Wer bei jedem Material die gleichen Einstellungen anwendet, erhält oft rissige Beschichtungen, Verfärbungshöfe oder eine Markierung, die matschig statt klar aussieht.
Wie Farbstoff und Farbe mit dem Laserstrahl interagieren
Lederoberflächen lassen sich im Allgemeinen in drei Kategorien einteilen, und jede reagiert unterschiedlich unter einem fokussierten Strahl.
Anilin- und Semianilinfarbstoffe
Diese Farbstoffe dringen in die Fasern der Haut ein, anstatt sich darauf festzusetzen. Da die Farbe Teil des Materials selbst ist, kann der Laser eine dünne Oberflächenschicht verdampfen und darunter einen helleren oder dunkleren Ton freilegen, wodurch ein natürlich wirkender Kontrast entsteht, ohne dass eine separate Beschichtung entfernt werden muss. Dies ist eine der nachsichtigsten Oberflächenbehandlungen für die Gravur.
Pigmentierte oder lackierte Decklacke
Bei pigmentierten Oberflächen wird eine mit Farbe gemischte Beschichtung auf Polymer- oder Acrylbasis verwendet, die auf die Oberfläche aufgetragen und nicht von ihr absorbiert wird. Diese Schicht kann 0,05–0,15 mm dick sein und da sie sich chemisch von der darunter liegenden Haut unterscheidet, kann sie anbrennen, Blasen bilden oder sich vom Leder lösen, wenn der Laser in einem Durchgang zu viel Hitze aufbringt. Eine geringere Leistung bei mehreren Lichtdurchgängen führt normalerweise zu einer besseren Haftung und Kantenqualität als ein einzelner Durchlauf mit hoher Leistung.
Leder und Kunstleder
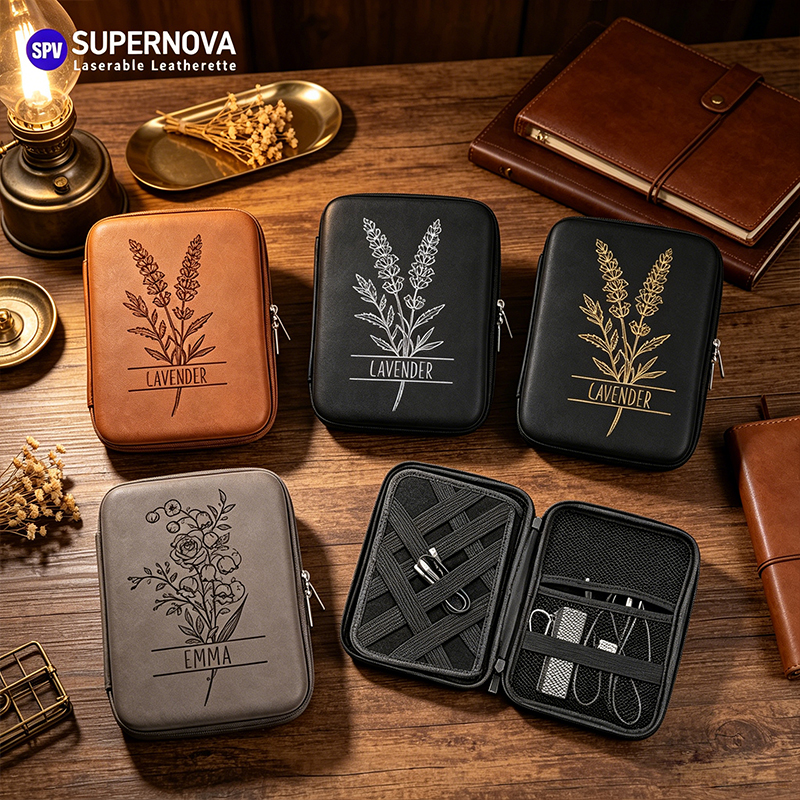
Versiegelte oder lackierte Oberflächen
Eine topische Versiegelung, beispielsweise ein Schutzmittel auf Lack- oder Wachsbasis, fügt eine weitere Barriere zwischen dem Balken und dem Leder hinzu. Bei diesen Veredelungen ist oft eine langsamere Gravurgeschwindigkeit erforderlich, damit die Versiegelung sauber durchbrennt, bevor die Farbschicht erreicht wird. Andernfalls kann die Markierung blass oder uneinheitlich erscheinen.
Die Farbe im Inneren der Haut ist verzeihend. Die darüber liegende Farbe ist es nicht – und diese einzelne Unterscheidung entscheidet über fast alle folgenden Einstellungen.
Empfohlene Einstellungen nach Finish-Typ
Es gibt keine universelle Einstellung, die für alle gefärbten oder lackierten Leder gilt, da die Dicke, Gerbung und Beschichtungschemie der Haut je nach Lieferant variieren kann. Die folgenden Startbereiche für einen CO2-Laser mit 30–60 W werden jedoch üblicherweise als Basislinie vor der Feinabstimmung an einer Schrottprobe verwendet.
| Finish-Typ | Macht | Geschwindigkeit | Pässe |
|---|---|---|---|
| Anilingefärbt | 15–25 % | 200–300 mm/s | 1 |
| Pigmentiert / bemalt | 20–30 % | 150–220 mm/s | 2 |
| Versiegelt/lackiert | 25–35 % | 120–180 mm/s | 2–3 |
Diese Zahlen dienen nur als Ausgangspunkt. Das Ausführen eines kleinen Testrasters mit inkrementellen Leistungs- und Geschwindigkeitsänderungen an einem Reststück ist die zuverlässigste Möglichkeit, Einstellungen vorzunehmen bevor Sie sich auf ein fertiges Stück festlegen, insbesondere bei lackiertem oder versiegeltem Leder, wo die Fehlertoleranz geringer ist.
Tipp
Starten Sie jede unbekannte Charge mit der niedrigsten Leistung im oben genannten Bereich. Es ist viel einfacher, einen zweiten Durchgang hinzuzufügen, als eine verbrannte Platte wiederherzustellen.
Echte vergleichen Leder und Kunstleder
Viele Werkstätten beschäftigen sich auch mit synthetischen Alternativen, und es hilft zu verstehen, wie sich die Lasergravur von Kunstleder von der Arbeit mit echtem Leder unterscheidet. Bei Kunstleder handelt es sich in der Regel um einen Träger aus Polyester oder Baumwolle, der mit einer Schicht aus Polyurethan (PU) oder PVC beschichtet ist. Sein Verhalten unter Lasereinwirkung ähnelt eher dem eines lackierten oder beschichteten Leders als dem eines natürlichen, gefärbten Leders.
- PU-basiertes Kunstleder lässt sich im Allgemeinen mit niedrigeren Leistungseinstellungen gravieren und erzeugt einen klareren, gleichmäßigeren Kontrast als PVC-basiertes Material.
- Mit PVC-beschichtetem Kunstleder ist Vorsicht geboten, da es beim Erhitzen Chlorgas freisetzen kann, das sowohl gesundheitsgefährdend als auch ätzend für die Laseroptik ist.
- Da die Farbbeschichtung des Kunstleders vollständig auf der Oberfläche sitzt, können selbst geringfügige Leistungssteigerungen zu sichtbaren Kantenverbrennungen führen, die bei absorbierter Farbe nicht auftreten würden.
Achtung
Gravieren Sie niemals unbekanntes Kunstleder, ohne das Trägermaterial zu bestätigen. Kunstleder auf PVC-Basis kann beim Erhitzen ätzendes Chlorgas freisetzen, das sowohl die Lunge als auch die Laseroptik schädigt.
Die Bestätigung des Trägermaterials vor dem Gravieren ist unerlässlich – eine kurze Überprüfung des Produktetiketts oder ein kleiner Brenntest in einer unauffälligen Ecke können Aufschluss darüber geben, ob das Teil auf PU oder PVC basiert, wodurch sich sowohl die Sicherheitseinstellungen als auch die Belüftungsanforderungen ändern.
Testen, bevor Sie sich für ein fertiges Stück entscheiden
Da die Endbearbeitungen zwischen Chargen, Färbechargen und sogar zwischen Abschnitten derselben Haut variieren, verhindert ein kurzes Testverfahren kostspielige Fehler bei einer fertigen Brieftasche, einem Gürtel oder einem Taschenteil.
- Schneiden Sie ein Reststück aus derselben Haut oder Rolle ab, die für das endgültige Projekt verwendet wurde.
- Führen Sie ein Raster aus kleinen Testmarkierungen mit unterschiedlichen Leistungsstufen in Schritten von 5 % aus und halten Sie dabei die Geschwindigkeit konstant.
- Untersuchen Sie jede Markierung unter normalem Licht und in einem Winkel auf Verbrennungen, Risse oder Ablösungen der Beschichtung.
- Wiederholen Sie den Vorgang mit einer zweiten Geschwindigkeitseinstellung, wenn das erste Raster keinen akzeptablen Kontrast erzeugt.
- Erfassen Sie die erfolgreichen Parameter, damit sie für zukünftige Chargen desselben Lieferanten wiederverwendet werden können.
Gute Praxis
Diese Gittertestmethode dauert normalerweise weniger als fünfzehn Minuten und kann verhindern, dass ein ganzes fertiges Stück durch eine einzige falsche Einstellung ruiniert wird.
Häufige Probleme und wie man sie vermeidet
Verfärbungshöfe um die Markierung herum
Ein schwach gelber oder brauner Ring um eine eingravierte Linie weist normalerweise auf einen übermäßigen Wärmestau hin. Eine leichte Reduzierung der Leistung und eine Erhöhung der Geschwindigkeit oder der Wechsel von einem einzigen tiefen Durchgang zu zwei leichteren Durchgängen lösen dieses Problem im Allgemeinen.
An den Rändern hebt sich die Beschichtung ab
Dies geschieht am häufigsten bei gestrichenen oder lackierten Oberflächen, wenn die Leistung für die Schichtdicke zu hoch ist. Mehrere Durchgänge mit geringerer Leistung führen tendenziell gleichmäßiger durch die Beschichtung als ein aggressiver Durchgang, wodurch das Risiko von Abplatzungen verringert wird.
Ungleichmäßiger Kontrast in einem einzelnen Design
Natürliche Häute weisen selten eine völlig gleichmäßige Dicke oder Farbaufnahme auf. Wenn der Kontrast bei einem Design merklich schwankt, kann die Beschaffung konsistenterer Materialien oder das Vortesten mehrerer Zonen derselben Haut die Abweichung vor dem endgültigen Durchlauf reduzieren.
Achten Sie auf
Wenn sich dieselben Einstellungen bei einer neuen Materialrolle plötzlich anders verhalten, behandeln Sie sie als völlig neues Finish und führen Sie das Testraster erneut durch, anstatt davon auszugehen, dass die vorherigen Einstellungen weiterhin gelten.
Schutz der Oberfläche nach der Gravur
Sobald ein Design markiert wurde, tragen einige Nachbearbeitungsschritte dazu bei, dass sowohl die Gravur als auch die umgebende Farb- oder Farbschicht über die Zeit erhalten bleiben.
- Wischen Sie lose Ruß- oder Kohlereste sofort nach der Gravur mit einem weichen, trockenen Tuch ab, bevor sie sich in der umgebenden Maserung festsetzen können.
- Tragen Sie einen leichten Lederpflegemittel sparsam um den gravierten Bereich auf, aber nicht direkt darauf, um ein Aufweichen der frisch markierten Oberfläche zu vermeiden.
- Bei Teilen, die täglicher Handhabung ausgesetzt sind, kann eine dünne schützende Deckschicht auf der gesamten Platte helfen, den Verschleiß zwischen den gravierten und bemalten Bereichen auszugleichen.
Diese Schritte sind besonders relevant für lasergeätzte Lederwaren für den täglichen Gebrauch, wie Geldbörsen, Notebookhüllen und Gürtel, bei denen Reibung und Feuchtigkeitseinwirkung eher dauerhafte Faktoren als einmalige Ereignisse sind.
Praktische Erkenntnisse
Sowohl gefärbtes als auch bemaltes Leder können erfolgreich graviert werden, allerdings muss die Vorgehensweise zum Finish passen. Absorbierte Farbstoffe wie Anilin sind am tolerantesten und erzeugen den reinsten natürlichen Kontrast , während Oberflächenbeschichtungen wie pigmentierte Farben oder Lacke eine geringere Leistung, mehrere Durchgänge und eine genauere Überwachung erfordern, um ein Anbrennen oder Abheben zu vermeiden. Das Testen von Ausschussmaterial aus derselben Charge bleibt der zuverlässigste Schutz gegen Oberflächenschäden, unabhängig davon, wie erfahren der Bediener mit einer bestimmten Maschine ist.
Werkstätten, die auch mit synthetischen Alternativen arbeiten, sollten bedenken, dass sich lasergraviertes Kunstleder eher wie beschichtetes Leder als wie natürliches Fell verhält – und bei PVC-beschichtetem Material zusätzliche Überlegungen zur Belüftung anstellen –, um sowohl kosmetische Fehler als auch Schäden an der Ausrüstung zu vermeiden. Mit den richtigen Einstellungen und einer kurzen Testroutine können die meisten gefärbten und bemalten Lederoberflächen mit präzisen, dauerhaften Ergebnissen graviert werden, die das Aussehen des umgebenden Materials bewahren.